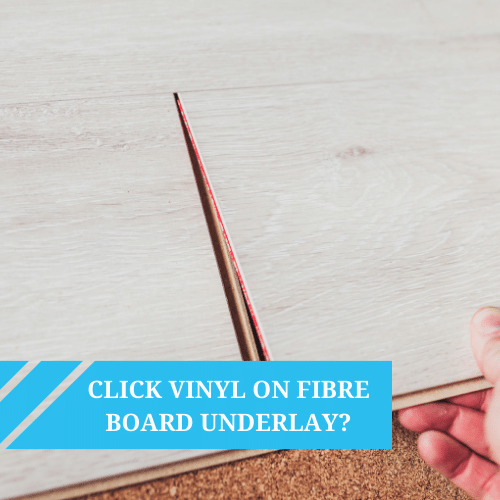
You’ve finally chosen your dream flooring, and you can't wait to get started transforming your space. But hold on, before you reach for that first plank, there’s one important step you can’t afford to ignore: acclimating your new vinyl or laminate floor.
Acclimating laminate and vinyl flooring isn’t just a technicality; it’s the key to a flawless, long-lasting installation. Skip this step and you might end up with warping, gapping, or even buckling - not exactly the Instagram-worthy floor you envisioned.
In this guide, we’ll walk you through why acclimation matters, how to do it properly, and the one exception that lets you skip this step altogether...


What Does It Mean to Acclimate Flooring (And Why Should You Bother)?
Before we get into the why, let’s talk about the what. Acclimating flooring simply means letting it adapt to the environment of your home, specifically the temperature and humidity of the room where it will be installed. This step helps prevent certain problems after installation.
Vinyl and laminate flooring might look tough, but they’re more sensitive to temperature and humidity changes than you’d think. Just like solid and engineered wood, these materials can expand and contract depending on their environment. If you install them straight out of the box, they may react unpredictably once they adjust to your home’s conditions—leading to unsightly gaps, raised edges, and even structural damage.
Be aware that even sheet vinyl floors should be acclimatised before being fitted. So, whether you're choosing luxury vinyl tiles or sheet vinyl, you should always acclimatise the floor by manufacturer instructions.
Acclimation is basically a waiting period that lets the planks get used to the room’s climate before installation, so you don’t run into problems later.
Think of it like this: Have you ever noticed how wooden doors sometimes stick in the summer but swing freely in the winter? That’s because wood expands in heat and contracts in the cold. Vinyl and laminate flooring behave the same way—acclimating them first means they won’t shift unexpectedly after installation.


How to Acclimate Laminate Flooring
A common question we hear is, "Does laminate flooring need to acclimatise?" The answer is yes! Acclimatising laminate flooring isn’t just a precaution—it’s an essential step to prevent warping, gapping, or buckling after installation. Laminate boards have a fibreboard core, which means they can absorb moisture and react to temperature changes. If you skip this step and go ahead with installing laminate flooring straight away, your planks might not lock together properly, and over time, your laminate floor could shift or lift in places.
So, how do you acclimatise laminate flooring the right way? Follow these steps:
Step 1: Store Flooring in the Right Room
Keep laminate flooring in its original packaging and place it in the room where it will be installed. It is not advisable to stack laminate flooring during the acclimatisation process; instead, the boxes should be laid flat and spaced apart to ensure even acclimatisation and to protect the integrity of the boards. Never store it in a garage, basement, or attic, as these areas tend to have temperature/humidity swings that could affect the boards. The boxes should be laid flat and, if possible, opened at the ends slightly to allow airflow. This helps them adapt evenly to the new environment.
Step 2: Maintain the Right Temperature and Humidity
The room should stay between 16°C and 25°C to help the boards acclimate properly. Humidity levels should be between 35% and 65%—too much moisture can cause expansion, while too little can lead to contraction. If you’re installing over concrete, use a concrete moisture meter before laying the floor.
Step 3: Allow 48–72 Hours for Acclimation
Most manufacturers recommend at least 48 hours, but if your home experiences frequent temperature fluctuations, it’s best to wait 72 hours. During this period, it's important not to stack your new laminate flooring to avoid damage.
Step 4: Check for Moisture Issues
If your home has a high humidity level, consider using a moisture-resistant underlay before installing the floor. This adds an extra layer of protection.
Step 5: Keep Air Moving
Proper air circulation helps laminate flooring acclimate evenly. If needed, use a fan or dehumidifier to balance the room’s temperature and humidity levels.
By following these steps, you ensure a smooth laminate flooring installation that lasts. Rushing the process might seem tempting, but taking the time to acclimate laminate floors properly can save you from costly repairs down the line.


How to Acclimate Vinyl Flooring
Vinyl is more resistant to moisture than laminate, but that doesn’t mean you can skip acclimation. Without this step, planks or tiles can expand or contract after installation, causing gaps or lifting edges. Acclimatising vinyl helps everything stay in place and look perfect once installed.
Step 1: Spread Out the Flooring in the Room
Luxury vinyl tiles (LVT) should stay in their packaging while acclimating. Spread the boxes out in the room where they will be installed, making sure they lie flat. If you’re working with sheet vinyl, keep it rolled up but store it in the space for at least 24 hours.
Step 2: Maintain the Right Temperature and Humidity
Keep the room temperature between 18°C and 29°C and humidity levels between 35% and 75%. If you’re installing over concrete, check the moisture level with a concrete moisture meter.
Step 3: Acclimate for 24–48 Hours
Luxury vinyl tiles (LVT) and vinyl planks typically need at least 24 hours to adjust, but some thicker products may require up to 48 hours. Let them settle in the area so they adapt to the room’s temperature and humidity before being laid.
Step 4: Keep the Flooring Flat
Vinyl planks should always be stored flat, not stacked on top of each other. This prevents bending or warping. If you’re working with sheet vinyl, unroll it just before installation to prevent curling.
Step 5: Allow Air Circulation
Good airflow helps vinyl flooring acclimate properly. If the room is particularly humid or dry, use a fan or dehumidifier to create stable conditions.
Following these steps will help prevent shifting or lifting after the installation process, keeping your vinyl floor looking as good as the day it was laid.


The Exception: Moduleo LayRed Doesn’t Need Acclimating
Most flooring needs time to settle before being installed, but Moduleo LayRed, a type of luxury vinyl flooring (LVT), is the exception. Thanks to its rigid core and built-in underlay, it’s far less affected by temperature or humidity changes. This means no waiting around - you can get straight to installation without worrying about expansion or contraction issues later on.
Because of its multi-layered construction, Moduleo LayRed offers extra durability, sound insulation, and a comfortable feel underfoot. If you’re looking for a quick and hassle-free installation, this could be the perfect choice.
For more details, check out the Moduleo LayRed range and the official installation guide.


What Happens If You Don’t Acclimate Flooring?
Skipping acclimation might not seem like a big deal at first, but once your flooring is installed, the consequences can start showing up fast. Here’s what can happen if you don’t give your laminate or vinyl time to adjust before installation:
- Warping and Buckling – If the flooring expands after it’s been laid, it can push against itself, causing planks to lift or bend.
- Gaps Between Planks – If the material contracts after installation, you might start noticing small gaps forming between the boards. This not only looks bad but can also trap dirt and moisture.
- Difficult Installation – If the planks haven’t fully adjusted to the room’s conditions, the locking mechanisms may be damaged and not lock together as smoothly as they should - installing laminate flooring is meant to be simple!
- Reduced Lifespan – A floor that hasn't been properly acclimated is more prone to long-term damage. Over time, the added stress from expansion and contraction can weaken the material, leading to cracks or separations.
Skipping this step to save time might seem like a good idea—until your brand-new floor starts buckling, gapping, or lifting at the edges. At that point, the “quick install” you were aiming for could turn into an expensive headache, with repairs (or even a full replacement) costing far more than a little patience upfront. Taking the time to acclimate your flooring properly is the best way to ensure a smooth installation and a long-lasting, trouble-free floor.
Already installed your laminate flooring and are noticing lifting or creaking? Check out our handy guide to uncover the cause and how to fix it.
How Long Does Flooring Need to Acclimate?
The amount of time your flooring needs to acclimate depends on the type of material, the environment, and the manufacturer guidelines. As a general rule:
Flooring Type | Acclimation Time | Notes |
---|---|---|
Laminate Flooring | 48 to 72 hours | Keep in original packaging, lay flat |
LVT & LVP | 24 to 48 hours | Keep in original packaging, lay flat |
Sheet vinyl | At least 24 hours | Keep rolled up until installation |
Moduleo LayRed LVT | No acclimation needed | Ready for immediate installation |
Environmental conditions can also play a role. If your home experiences big temperature or humidity swings, giving your flooring a little extra time to settle can help avoid issues down the line. Different parts of the UK experience differing temperatures and humidity levels. Did you know, for example, that the region you live in can impact the acclimatisation period?
Patience might not be the most exciting part of a new flooring project, but giving your new flooring time to adapt is one of the easiest ways to make sure your installation goes smoothly and stays problem-free for years to come.
Always keep the manufacturer's recommendations close at hand. Following the specific guidelines provided ensures that your flooring adjusts as it should and stands the test of time.
Common Mistakes to Avoid When Acclimating Laminate and Vinyl Flooring
Skipping or rushing acclimation can lead to problems once your floor is installed. Here’s what to watch out for:
Mistake | What Can Go Wrong |
---|---|
Not giving enough time | Planks may warp, gap, or buckle after installation. |
Wrong temperature or humidity | Flooring might expand or shrink, causing fit issues. |
Stacking the flooring | Can damage the planks and prevent even acclimation. |
Ignoring the manufacturer’s instructions | Every flooring brand is different, and skipping steps can cause problems. |
Not checking for moisture | Excess moisture can cause planks to swell, lift, or warp. |
Poor air circulation | Uneven acclimation can lead to installation issues. |


Ready to Get Started?
We know you’re eager to start installing your new floor, but taking the time to let it acclimate will save you time, money, and stress in the long run. As exciting as it is to see your space transformed, skipping this step could mean dealing with warping, gaps, or buckling—problems that can turn your dream floor into a frustrating fix. Acclimation ensures your floor fits in perfectly with its new environment: a little patience now means a flawless, long-lasting result.
If you’re looking for high-quality laminate or vinyl flooring that’s built to last, check out our full range:
Got questions? Contact us, and our flooring experts will be happy to help!
Proper acclimation is just one step in ensuring your vinyl flooring stays in top condition. Want to avoid other common mistakes? Check out our guide on what not to do with vinyl flooring.